Posts

Showing posts from May, 2018

Week 15: This is why we don't have public 3D printers.

Image
I have not spent too much time working on our group project this week. At home, I have continued to produce 3D printed parts. At Superway I have been asked to get the shops 3D printers up and running. One of the printers has not been operational since I entered Superway last semester. Since I have assembled two 3D printer kits I have a pretty good understanding of their functionality. To further add to this, I have spent quite a bit of time in Marlin (3D printer firmware) and I am very comfortable editing the source code for different printers. Most of my time at Superway this week has been dedicated to getting this finished. Although this means I am not working on the project it is a much needed break. I have spent all of the last weekend working. Standing during all of my shifts has taken a toll on me and spending some time at Superway sitting down is helping me recover. Thankfully, Angelo has taken the lead with finishing up the curved rail sections. Thursday of this week our team m...

Week 13-14: Continuing work on the switch and turn sections

This week is dedicated to rolling more metal. I have continued working on the turn sections and the other switch. The other switch is almost complete! As of right now I have about 100 hours of 3D printing left. The end of the semester is coming quickly and the amount of work we have left is daunting to think about.

Week 12: Finishing up the switch...

Image
Set back after set back..... It turns out that the cad drawing I have been working from in producing the switch had a few incorrect dimensions. The dimensions on this model did not reflect all of the new changes that were made when we switched from a 2 inch to a 1.5 inch rail width. With the new dimensions all written down, I have finally produced and mounted a switch section!

Week 11: Presentation 2

This week we ran out or Aargon gas for our TIG welding at Superway. This is a huge setback for us since we are unable to continue working on our support structure. For my second presentation I focused on discussing our time table for the project. Frankly, I wish we were further along with the project. Every set back hurts our timetable. Regardless, I do feel as if our team has accomplished a lot of work so far. At this point in time I have approximately half of the 3D printing for this project completed. Double dipping working on this project as a group and on my own at home is becoming a daunting task.

Week 10: Trying to make a switch

Image
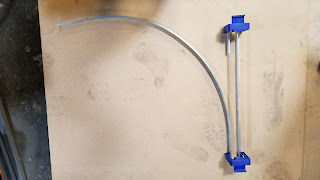
Given that we now have a reliable way to bend aluminum, I have began attempting to make a switch. Although I haven't completed the entire switch, I do have a portion of it started. Unfortunately, I still need to device a method to attach the straight portion of the switch with the curved rail (the missing rail in the image).

Week 9: Bending 6061 Aluminum

Image
Figuring out how to bend aluminum is proving to be the most stressful part of the project. Looking back, if we had the budget to purchase a series of aluminum that is easier to bend (something like a 3000 or 5000 series aluminum) this aspect would be a lot easier. We chose not to utilize a different series of aluminum due to the high cost of those series of aluminum. On Tuesday, I met with Professor Muntz in hopes of utilizing the school's machine shop to produce new rollers for our ring roller. The idea here was that producing a smaller roller would open up the ring roller and allow us to produce the necessary bends. Muntz instead suggested easier ways to modify our purchased ring roller. His suggestions included grinding away some of the side plate material on the ring roller in hopes of opening up the roller more. Although this worked, the produced rings have a terrible surface finish as the ring roller tears into the aluminum rail. What to do when things go wrong? More researc...

Week 8: Finishing up the support bases

Image
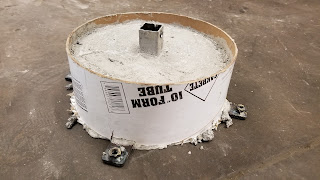
The goal of this week was to finish up our support bases. All of my energy this week went into mixing concrete and pouring them into the molds. At this point in time, it finally is beginning to feel as if we finally have something to show for all the work that we have been putting into the project.

Week 7: Continuing with the support structure

Image
This week Bryan focused his energy on welding our support structure. With him working with the welder, I was able to focus my energy on other aspects of the project. I have spent this work working with our aluminum rail sections. I have been experimenting with the ring roller that we purchased for the project. On our thinner aluminum bar that we are using for the switches third rail it works perfectly. Unfortunately, the ring roller will not open (it's zero position) far enough to roll our aluminum rails for the switches and curves. I will have to further investigate this. I also began mixing concrete for our first few concrete support bases.

Week 6: Support Structure Fabrication and a Linear Rail Section

Image
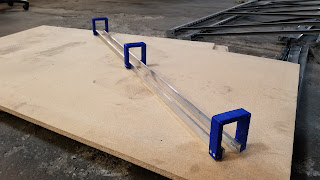
This week we have continued work on the support section. There is still a lot of welding that needs to be accomplished. Along with this, I have went ahead and produced not one but two linear rail sections!